Wednesday 31 May 2023

RADIO FUN IN THE GARDEN


It was such a lovely day today, I decided to set up in the garden.  I mounted the Slidewinder on its tripod and added 8 radials.  The second set of 4 made a big difference on this ground.

Conditions were not great but I managed 5 SSB contacts on 50W but unfortunately nothing on CW, despite calling for some time on 40m and 20m.  Just one of those things.  The Mission RGO ONE is superb on SSB and stations had no problems hearing me as long as the QSB was not too deep.

My noise floor is horrible at home and if you watch the video below, you will hear a couple of times where the audio comes up above the local noise and all you can hear is the signal.  Just a super little radio, I get more and more impressed with it.  The internal speaker is fabulous!

Linda did some filming while I was operating and it can be found below.


73 Ian

Sunday 28 May 2023

MISSION RGO ONE CURRENT CONSUMPTION


A few people have asked me how much current the RGO ONE uses at various power levels, so I thought I would do a quick post and video about it.

In fairness, this is not too scientific but it does give a reasonable idea of the current draw at various power levels.

For myself, I am happy with these levels.  I have a 55Ah battery in the car that I use and that is easily enough for this radio.  Obviously, I would not carry this setup up a hill or across fields but I tend not to do that anyway :)

For me, the additional power of the RGO ONE is enough to make it a truly useful radio for my needs.  I will be doing a similar video with my KX3 to see how that compares at the lower power levels.


73 Ian

Friday 26 May 2023

RGO ONE POTA ACTIVATION


I finally managed to venture out with the Mission RGO One and activate POTA G-0070 on both CW and SSB. My normal spot was not useable as the sheep were out, so I changed site and I am glad I did.  It was a better location and I could get the Slidewinder away from the public.  There were much fewer of them here too!  I put 8 radials on the Slidewinder and it worked well.

I had some issues early on and the tuner in the RGO ONE was struggling.  I had another look and the PL259 at the bottom of the Slidewinder was not fully tight.  My bad as they say.  Now everything worked just fine.

I was able to sit outside the car and the chair was surprisingly comfortable.  The little table was OK but a little small and made CW a bit more difficult as it tended to sway.  On the list is a better table for sure!

The sun was out all day and the view was glorious!  Morecambe Bay is such a beautiful place to be.


I did learn a valuable lesson.  you would think at my age I would have thought about this and in fact, I did bring my Tilley hat with me, then completely forgot to change to it!  Learn my lesson and don't wear a baseball cap in direct sun! I should have 'got down with the kids' and worn it backwards :)


For some reason, my dear wife thinks this is hilarious!


I have to say that my Morse head was not on today for some reason but I managed a few contacts and they were patient with me :)

40m can be tricky at times in the UK.  Today was no exception and the band was not being kind.  I really thought that I may not complete the activation at times.  After battling 40m for a while, I made the decision to move to 20m.  I started on CW and sent a spot to the POTA website but nothing doing. 

I was really getting worried now and I moved to SSB with trepidation.  After all, CW is easier than SSB for contacts, right?

I posted a spot on the POTA website and started calling.  Very quickly, I had a good run going.  By this time, I had gone to 40W and this made all the difference.  Of course, this is why the RGO ONE was a good fit for me.  It behaved beautifully all the way through.  I didn't bother trimming the RF gain as some stations were very weak with me but to be honest, there was no need.  The radio was really quiet with just the interference from the electrified railway track close by.  I only got this when a train went by, so I wasn't worried about that either.

I ended up with 28 contacts in total and it was getting close to lunchtime, so once the run finished, I packed up.  I found a perfect Pelicase copy to put the portable shack in for transport.


The RGO ONE fitted my operating style perfectly, as I hoped it would and Linda recorded my TX audio on her JST-245.  The result sounded superb and I am really happy with it.  I think this radio and I are going to be very happy together.  I just need to get a little more used to it but it really is not hard to use.  

Everything works as it should and I found it a perfect portable HF radio.

I recorded a video or my activation and I hope you enjoy it.  The GoPro battery ran out about halfway through, so I missed my little run on 20m SSB.  Additional batteries are on order!


73 Ian


Sunday 21 May 2023

MISSION RGO ONE INITIAL THOUGHTS


I was lucky to be able to buy this little radio recently and boy am I glad I did!  I love small form factor radios and this immediately reminded me of my K2.  It's around the same size and covers all bands from 160m - 10m including 60m.  This particular radio is fully kitted out with all the current options, including the optional additional 4 pole filter, ATU, Noise blanker and H Mode Mixer.

Like the K2, it is a single down conversion superhet and the features and specs are below.

As anyone who follows my exploits on YouTube or on this blog, I like to go portable.  My noise floor at home is terrible and someone is managing to put something on charge at weekends that is making 20m difficult now!

I have had reports that the internal speaker is not great but I have to say that I have found it fine and loud!  Perhaps I am less bothered about it sounding 'tinny' than others.  With my ears, that is probably a good thing 😂

I downloaded the manual from the website and had a good read.  It is really not that complicated a radio, which I love and everything you need on a regular basis is on the front panel, with the menu items being reserved for 'set and forget' items.

One thing I was not happy with was the sound of the narrow filter on SSB.  This is variable and with this kind of filter you expect some boxiness of the audio at narrower bandwidths but it was really boxy.  I grabbed the filter manual and had a look.  The filter centre points and bandwidths are user adjustable and you can stay in the menu while you adjust, making it a breeze.  I got it where I wanted it and it is much better now.  Again, probably the difference in my ears compared to the previous owner.

The one thing I am hoping for is the promised audio filter.  There is a socket on the board for it, so hopefully this will arrive soon.

Initial operation was on SSB with 10W.  The radio will do 50W but when I am portable I tend to work QRP, so why not? 😎 I was at the home shack and so was using my 40/80m trap dipole at 35ft and my Cushcraft R6000 vertical.  I got 54 from Minsk on 20m and 59 plus from Orkney on 40m.  Considering the band conditions, I was extremely pleased to say the least.

I am sure that I will continue to tweak things for a little while but I am absolutely in love with this radio already!  It is firmware upgradable and so I expect it to get even better over time.

The radio was designed and is manufactured in Bulgaria by Boris, LZ2JR.

You can find a much more detailed review on Tom's blog at tommcquiggan.blogspot.com

Here is a short YouTube video showing my initial contacts


SPECIFICATIONS:

  • QRP/QRO output 1 – 50W [1 watt increments]
  • All mode(?) shortwave operation – coverage of all HAM HF bands (160m/60m optional) No AM/FM modes
  • High dynamic range receiver design including high IP3 monolithic linear amplifiers in the front end and diode ring RX mixer or H-mode first mixer (option).
  • Low phase noise first LO – SI570 XO/VCXO chip.
  • Full/semi (delay) QSK on CW; PTT/VOX operation on SSB. Strict RX/TX sequencing scheme. No click sounds at all!
  • Down conversion superhet topology with popular 9MHz IF
  • Custom made crystal filters for SSB and CW and variable crystal 4 pole filter – Johnson type 200…2000Hz
  • Fast acting AGC (fast and slow) with 134kHz dedicated IF
  • Compact and lightweight body (5lbs / 2.3kg)
  • Custom made multicolour backlit FSTN LCD
  • Custom moulded front panel with ergonomic controls.
  • Silent operation with no clicking relays inside – solid state GaAs PHEMT SPDT switches on RX (BPF and TX to RX switching) and ultrafast rectifying diodes (LPF)
  • Modular construction – Main board serves as a “chassis” also fits all the external connectors, daughter boards, inter-connections and acts as a cable harness.
  • Optional modules – Noise Blanker (NB), Audio Filter (AF), ATU, XVRTER, PC control via CAT protocol; USB UART – FTDI chipset
  • Double CPU circuitry control for front panel and main board – both field programmable via USB interface.
  • Memory morse code keyer (Curtis A, CMOS B); 4 Memory locations 128 bytes each

  • Classic superhet design – with popular 9MHz intermediate frequency. Filter method DSB to SSB modulation
     
  • Coverage of the 9 HAM HF bands (160m optional)
     
  • High dynamic range receiver design including high IP3 monolithic IC in the front end and H-mode first mixer
     
  • Fast acting IF (134kHz) AGC.
     
  • Clickless operation – solid state GaAs PHEMT SPDT switches on RX, (bandpass filtersTX/RX) and ultra fast rectifier diodes (LPF)
     
  • Custom multicolor FSTN LCD (Especially developed for this project)
     
  • Custom made plastic face plate, unique and ergonomic knob controls
     
  • Custom made crystal filters – 6,8 pole, CF=9MHz, 2.8kHz, 2.7kHz, 1kHz, 500Hz

  • Double CPU circuitry control for front panel and mother board, both field programmable via implemented USB hub.

  • Modular construction with no “flying wires” inside the box. Transceiver is built up on a main – mother board which has two functions. First to serve as a “chassis” and second to fit all the external connectors, daughter boards, inter-connections and acts as cable harness.
     
  • Plenty of optional modules: Audio filters, Automatic antenna tuner (ATU), Noise blanker (NB), narrow/wide band IF crystal filters.
     
  • Linear final amplifier PA 50W with precise power adjustment especially for QRP operations. Forget noisy FANs – 25W  – unlimited time!! QRO work – with max power of 50W driving should be sufficient for a kilowatt amplifier.
     
  • Personal computer control CAT via USB
     
  • Morse code keyer (Curtis A, CMOS B)
     
  • Contest and DX-pedition operation conveniences
     
  • Both Kit & Pre-Built versions will be available for sale


  • Thursday 18 May 2023

    CALLSIGNS, WHO AM I?


    OK, this is a bit of a rant I guess.  I will try to be objective and start with basic stuff :)

    The idea of a callsign is to identify the station transmitting.  To this end, we have a protocol that makes sense.

    Always Give Your Own Callsign Last!
     

    So, if you are in a QSO and passing the transmission and wish to give both callsigns, the format is 'To You From Me'

    Therefore, if I was passing transmission to my dear wife, I would say

    G0YLM, from G0VGS

    I might even simplify it further by simply saying 

    G0YLM, G0VGS.

    She might then say, 

    G0VGS, G0YLM

    This confirms the owner of both callsigns.  I am G0VGS and she is G0YLM.  Simple and intuitive.  Think of it as a greetings card.  

    To Ian, Happy Birthday, from Linda.

    Of course, the only callsign you are required to give is your own.  In a net though, especially a 'round robin' style net, passing the transmission ensures that it is going to a specific station.

    While we are on the subject of nets, ALWAYS pass it to a specific station!  If you are not sure who to pass it to, pass it to net control, or at least to the last person you heard.  NEVER throw it up in the air!  This only causes confusion and people start doubling with each other with the best intentions.

    These are simple little 'rules' that can only help improve operating practices.


    <rant>

    OK, here goes!  Deep breath!

    Something I have noticed recently and is really starting to annoy me are incomplete handovers.  People give your callsign and completely omit theirs!  Anyone listening will be totally confused by this!  I hear this on the start of an over and at the end too!

    For example.  I pass it over to G7RXM..

    G7RXM, G0VGS

    He then says..

    G0VGS

    then carries on with his over.  So who is G0VGS?  Is it me or him?  I hear it at the end too.  G7RXM is passing it to G0VGS..

    Over to you Ian, G0VGS...

    I then reply

    G7RXM, G0VGS

    Again, who owns what callsign????  This is simply lazy and confusing.  Protocols are there for a reason and we should, for good operating practice, try to be as professional as possible.  It is truly annoying!!

    </rant>

    Maybe it is just me but it is only a simple little thing that can cause real confusion.  You would actually fail some professional exams for this kind of error.  Knowing who owns which callsign is a fundamental part of our hobby.  

    73 de G0VGS

    Wednesday 17 May 2023

    JUST GREAT SERVICE!


    Just a short post to thank the guys at M1ECC Antennas for their amazing service.  I ordered a Slidewinder extension mast yesterday at 10:30 am and the Post Office delivered it this morning at 10am!

    Just amazing service.  Many thanks.

    (I guess I should thank the Royal Mail too ;))


    73 Ian

    Tuesday 16 May 2023

    KOSS SB-45 HEADSET


    I have wanted a decent headset to use with my KX3 for some time.  The one everyone loved was the Yamaha but is is not available in the UK currently.  I had heard about the Koss headset and did some research.  There are 2 versions and you need to make sure that the version you go for has the electret mic element.  The Koss SB-45 fits the bill perfectly.

    The headset fold up nicely into quite a small space and fits in my Go-Box without issue.  The boom is very flexible and the ear cups go over my ears and are very comfortable.


    The headset itself is really light as is the head pressure.  I could wear these for a long time without issue.  The cord is terminated in 2 3.5mm stereo jack plugs and are clearly labelled with the usual symbols on for mic and phones, as well as being different colours.


    For the KX3, I simply plug both in and then use the XMIT button on the bottom left as a PTT.  It works really well.


    I believe that a simple push button PTT can be made that plugs into the ACC jack of the KX3 and I will be looking at this in the future.

    On air, I get great reports on audio and the receive audio is crisp and clear.  These headphones are designed for communications and it shows.

    I can thoroughly recommend them and as they are £33 on Amazon at the time of writing, they are not going to break the bank either!

    I have made a short video about the headset and you can find it below..


    73 Ian

    Saturday 13 May 2023

    SW-102 VHF/UHF SWR/POWER METER


    I have needed a decent, easy to use SWR Meter and power meter for some time that covered VHF/UHF and this fits the bill nicely.  It is simplicity itself to use and gives plenty of information on the display.

    Mine needed charging out of the box but it does come with a very Apple like charging plug and a short USB lead.  Charging took very little time and it will be interesting to see how long the charge holds.

    Powering on and off is a little unintuitive but once you know, you know :). You hold the red button and the display backlight comes on.  A timer then shows on the screen that counts down until it boots up.  You can then release the button.  Powering down is the same but at the end of the countdown it simply switches off.


    The display shows the RF power, frequency and VSWR, as well as showing both forward and reflected power.  It also gives you an idea of what percentage of your RF power is actually being sent up the coax to the aerial.

    If you have equipment that is calibrated, there is a menu that allows you to tweak the configuration of the meter to reassure you of its accuracy.  In my tests it seemed just fine.

    I got this from Amazon and I was happy with the price I paid for what is a very useful piece of kit.

    I have done a short unboxing video and you can find it below.


    73 Ian

    Friday 12 May 2023

    THE SLIDEWINDER EXTENSION MAST


    A good friend of mine, Brian G0RDH, recently purchased a Slidewinder kit and added a new piece of kit, the Slidewinder Extension Mast.  This is a 1ft/300mm length of aluminium, threaded at one end and a 3/8 socket at the other.  I was interested to find out just what difference it made, if any.

    It was a lovely day, so I set out to test it.  The results were definitely positive.  It is quite surprising just how much difference it made on some bands.

    I did manage a short activation, working 4 stations on 20m CW, from Croatia to Barrow :)

    Rather than cover everything in this post, I did make a video of my findings.  You will find it below and I hope you enjoy it.

    CAVEAT - I made a huge mistake when looking at 10m in the video.  I should have removed the coil!  I blame age!


    I will definitely be getting this to add to my Slidewinder setup.  I have not tested it on the tripod as yet, so more fun to be had there. :)

    73 Ian

    Tuesday 9 May 2023

    PARKS ON THE AIR


    Parks On The Air, or POTA, is an international award scheme for Amateur Radio operators.  It was started in 2017 in the USA and has since expanded to include over 130 DX entities!

    The idea is simple.  There are activators and chasers, just like other award schemes like SOTA for example.  For POTA, only the activators upload logs.  The chasers are awarded points based on the activator logs.

    A Park is a specified location, not just any local park.  You can find all the information about them on the website, which is a mine of information.

    One of the great things about POTA is that you just have to be in the area of the Park.  For example, Morecambe Bay is an area of outstanding natural beauty and is included as a Park.  This makes activating POTA very accessible.  Although there are Parks that involve a climb, a lot do not and you can even operate from the car.

    Activators need to make 10 contacts from the Park in order to qualify for the activation.  These can be any mode or mixture of modes.  It is also possible to work P2P or 'Park to Park', which is keenly sought after.

    All the needed information is at the main POTA website and the activation site is pota.app where spots are posted.  Activators are encouraged to spot themselves here and many schedule their activations.


    I have had a lot of fun with POTA although I have only managed a couple of Parks so far.  It's a great excuse to go out portable with the knowledge that folks will be looking for you :)

    As for logging, I use an app on my phone called HAMRS (pronounced 'hammers').  This has a specific template for POTA and does RBN and QRZ lookups if you have Internet available.  HAMRS makes it simple and quick to log and easy to extract the ADIF needed to upload to POTA once the activation(s) are complete.  It actually has a nice general logging template for portable use too!

    If QRZ is enabled, the relevant fields are populated automatically, making it a breeze to log.  HAMRS is available for just about any platform.

    Have a go, there are hundreds of locations to operate and you can find them from maps on the POTA site.


     POTA is a well thought out award scheme and a friendly place to be :)

    73 Ian

    Monday 8 May 2023

    THE MORECAMBE BAY REPEATERS


    As well as the GB7MBC DX cluster (a subject of another post I am sure!), I run 2 repeaters here in Morecambe.  Both are on 70cm.

    GB7MB

    This repeater is a DR-1X connected to North West Fusion Group.  It is on a 9 MHz split with the TX on 439.700 MHz and the RX on 430.700 MHz.  I choose not to have it movable, just like the other core repeaters in North West Fusion Group.

    It has pretty good coverage considering my house is at sea level.  Yaesu System Fusion is, in my opinion, the simplest and best of the digital voice modes so far.

    If you have not tried Fusion, I can recommend it.  I know a lot of people decry digital voice as not real radio but they could not be further from the truth.  I have done many videos for North West Fusion Group on YouTube and one of the ones that gets the most hits is about exactly that!


    North West Fusion Group actually started as a simplex net and then got its first repeater.  The ability to link repeaters together just enables a larger footprint as hilltop sites are at a premium these days!


    GB3MO

    This repeater is a new addition.  It runs on a separate aerial to GB7MB and is on reverse frequencies on a 7.6 MHz split.  The TX is on 438.3875 MHz and the RX is on 430.7875 MHz.  As this is an analogue repeater, it has a CTCSS of 110.9 Hz.

    GB3MO is an AllStar repeater, based on two Motorola GM360's.  The logic is all held on a Raspberry Pi, along with the HamVoIP software.  One of the great things about AllStar repeater is that it is full duplex.  This means other people can call in over the network or over the radio and still be heard, even if someone doesn't leave a courtesy gap.

    This repeater is connected to North West Allstar Group, a sister group to NWFG.  Both groups cover a large area of the North West of England as well as some additional gateways and repeaters in other parts of the UK.

    The reason for the reverse frequencies is that both repeaters TX at the same end of the band.  This makes filtering so much easier.  Both repeaters use a Procom duplexer and as belt and braces, I use a notch filter on both transmitters, each notching out the receive of the other repeater.

    If you are ever up around The Morecambe Bay area, or maybe have a Fusion on AllStar node, it would be great to hear you :)


    73 Ian


    Sunday 7 May 2023

    THE QCX MINI FROM QRPLABS


    I haven't built a full kit since building my K2 back in 2004.  I don't count the several K3's that I built as they are really just slotting boards together.  Actually getting the soldering iron out was brilliant!

    The QCX Mini from QRPLabs is a lovely little kit.  It's a single band, 5W CW transceiver with some great features.  A lot of the components are surface mount but these are already soldered on to the board. This is brilliant for me because there is no way my eyes would allow me to use surface mount components these days :)

    You still get the joy of winding toroids and fitting discrete components and hardware.  The manual is excellent and you start by winding the main transformer.


    I also fitted the socket for the IC at this point.  Some care needs to be taken to ensure you don't get your soldering iron close to any installed surface mount components and melt the solder there but it really is not difficult.  The quality of the board is superb and solder flows well.  The transformer and other toroids are wound with enamel coated wire and this acts as an insulator of course.  I find the best way to work with this is to install the toroid and hold the iron onto the wire, add a little solder and leave the iron on for 10-12 seconds.  This melts the enamel and you can actually see when it happens.  Make sure you have got good connections by checking with a multimeter.  All it takes is a little patience and care.

    I have put a short video on YouTube explaining how to wind toroids, which is also a part of my QDX video.  I thought it was worth putting out as a single short video though, so here it is.


    The rest of the board goes together quite well and you end up with something that should look like this...


    At this point you build the controls board and complete the kit, ready for testing and alignment.


    Now comes the scary part! Get a bag handy, just in case you need to catch the escaping smoke! However, with any luck, the radio should turn on and the LCD should illuminate.  You will probably have to adjust the contrast to actually read what is on the display.


    Now it is just down to alignment.  This is done via 4 pots and a menu item.  It could not be simpler.  The manual explains everything.

    I did a short video on my build of the QCX Mini for 40m and you can find it below.


    You might also find it useful to watch the following video by Hans Summers, G0UPL.  It shows the whole procedure of setting up the QCX.  Although this is not based on the Mini version of the QCX, it is exactly the same procedure on the Mini.


    I have had several contacts on the QCX and it's really great fun.  It's a great receiver and the built in reader works very well.  There are memories as well.

    If you want a nice little kit to build that will give you lots of fun, I can thoroughly recommend the QCX Mini.

    The information below is taken from the QRPLabs website

    Special portable-friendly features:

    • Small size: 95 x 63 x 25mm enclosure (plus protusions)
    • Low current consumption (for example 58mA receive current, with 12V supply and display backlight off)
    • Low weight, 202 grams
    • Sturdy extruded aluminium enclousre
    • All-metal BNC short connector, bolted to enclosure

    List of features: 

    • Easy to build, two-board design, board with main circuit and connectors, display panel board with LCD; all-controls board-mounted on a press-out sub-board. No wiring, all controls and connectors are board-mounted
    • Professional quality double-sided, through-hole plated, silk-screen printed PCBs
    • Choice of single band, 160, 80, 60, 40, 30, 20 or 17m
    • Approximately 3-5W CW output (depending on supply voltage)
    • 7-14V recommended supply voltage
    • Class E power amplifier, transistors run cool… 
    • 7-element Low Pass Filter ensures regulatory compliance
    • CW envelope shaping to remove key clicks
    • High performance receiver with at least 50dB of unwanted sideband cancellation
    • 200Hz CW filter with no ringing
    • Si5351A Synthesized VFO with rotary encoder tuning
    • 16 x 2 yellow/green LCD screen
    • Iambic keyer or straight key option included in the firmware
    • Simple Digital Signal Processing assisted CW decoder, displayed real-time on-screen
    • On-screen S-meter
    • On-screen real time clock (not battery backed up)
    • Full or semi QSK operation using fast solid-state transmit/receive switching
    • Frequency presets, VFO A/B Split operation, RIT, configurable CW Offset
    • Configurable sidetone frequency and volume
    • Connectors: 2.1mm power barrel connector, 3.5mm keyer jack, 3.5mm stereo earphone jack, 3.5mm stereo jack for PTT, 3.5mm stereo jack for CAT control,  BNC RF output
    • Built-in test signal generator and alignment tools to complete simple set-up adjustments
    • Built-in test equipment: voltmeter, RF power meter, frequency counter, signal generator
    • Beacon mode, supporting automatic CW, FSKCW or WSPR operation
    • GPS interface for reference frequency calibration and time-keeping (for WSPR beacon)
    • CAT control interface
    • Optional 50W PA kit
    • Optional aluminium extruded cut/drilled/laser-etched black anodized enclosure

    Friday 5 May 2023

    THE SLIDEWINDER PORTABLE ANTENNA


    I have been using this antenna for a little while and I have to say that I am most impressed with it.  I have done several videos on it on my Bay Amateur Radio Group YouTube channel and I will include a couple below.  I love to get out portable and I am very lucky to live in the beautiful place that is Morecambe Bay.

    I can go down to the shore and operate for POTA and WFF easily, all on a salt marsh :)

    The antenna itself is based around the Slidewinder Coil.  This is available in several colours to suit your mood ;)


    This is extremely well built and based around a 3/8 thread unlike some other portable aerials.  You can match this with a whip of your choice or go for the Slidewinder Military Whip option.  I have this and it works really well.  You can't adjust it in quite the same way as a telescopic whip but you can fold over a section if needed.  I suspect that in the long term, the Mil whip will be more robust as telescopic whips tend to bend and/or crease over time.

    There are several mounting options.  Obviously as it is based around a 3/8 thread, you can mount it on a magnetic mount or other vehicle mount.  M1ECC Antennas, who produce the antenna, do a roof bar/balcony mount, as well as a ground spike and a tripod option.  I have the ground spike and the tripod and both work well and are solidly engineered.

    The aerial works really well from 40m to 10m and I have zero complaints.  I have never needed to guy it so far but I suspect in a solid breeze, it might be a good option.  Tuning it is a breeze.  Some people simply slide the collar for maximum receive and then use a tuner.  I am a little more OCD about it :). I like to use my Rig Expert to tune it.  Doing this enables me to get whole band coverage at under 2:1 across all bands, including 40m!  You soon get used to where to start with the collar and then it is a simple job to tweak until you are happy.

    I did find that with the aerial on the roof of the car, mounted on a triple magmonut, that the base sWR was quite high.  This is not the fault of the aerial but a lack of ground.  A counterpoise or a couple of radials would probably resolve this but it does work and in an area where getting an aerial out is difficult, would be a useful way of mounting the aerial.

    Again, the service from M1ECC Antennas is superb and their communication is excellent.

    One new option is a short 300mm/1ft extension bar.  this goes between the mount and the coil and raises the coil.  This makes it easier to get to the coil and I am hoping to test one very soon to see what difference it makes.  I will no doubt do a video for this when I do.  

    I can recommend this antenna system wholeheartedly.  In the meantime, here are a couple of videos about it.

    Testing The Slidewinder Antenna (Part 1)


    Testing the Slidewinder Antenna (Part2)


    MY CW YEAR


    I passed my Morse test in 1995 to gain my callsign, G0VGS.  For those of you who are not aware of how the licence used to be structured in the UK, it consisted of two classes of licence.  The B licence and the A licence.

    Both of these were full licenses (despite claims by some ;)) and the difference was that the class A licence allowed the use of the HF bands (30MHz and below).

    I passed my City and Guilds Amateur Radio Licence in 1994, gaining the callsign, G7RXM and then started studying for my Morse test. This was a 12wpm send and receive test and in my case was taken at my local club.  I actually passed 2 Morse tests but I will maybe go into that another time ;)

    Since then, I have never really used the mode in anger.  To be honest, I found it really stressful.  I can be quite hard on myself and I was frustrated that I was missing letters and words!  If I lost track, I could miss a whole sentence until I was able to focus again.

    At the end of 2022, I was talking with a friend and he mentioned that we don't worry on SSB if we miss things, we just ask for a repeat.  No stress.  That made me think.  Why should it be different on CW?

    I made a decision to get my CW up to scratch in 2023 and the decision was totally made for me when I got back in touch with an old friend, G0TUE.  Ray is a great CW proponent and very enthusiastic and encouraging.  We set a sked and had a contact on 40m.

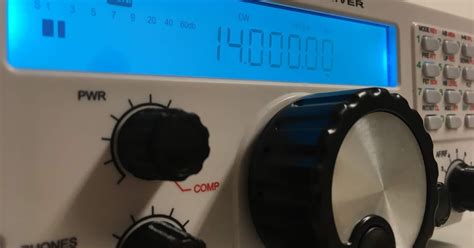
    This year (2023) I have disconnected the microphone from my K3s and I am only working CW from the home station.  I made a resolution to have at least 2 CW contacts a day this year.  This sounds a simple enough task but actually, due to the usual life events and poor band conditions, I am slightly behind.

    I started around 12wpm and was missing words as I have always done.  This time though, I didn't worry about it.  I stayed around the FISTS frequencies to begin with and started calling CQ.  That way, I should be able to control the speed of the conversation.  In the most part, this worked.  There were still some who insisted on going at their own speed but hey ho, if I can't copy, I can't copy.  I thank them and move on.

    Since then, I have increased my sending speed slowly and I can now copy around 16wpm and head copy is getting better.

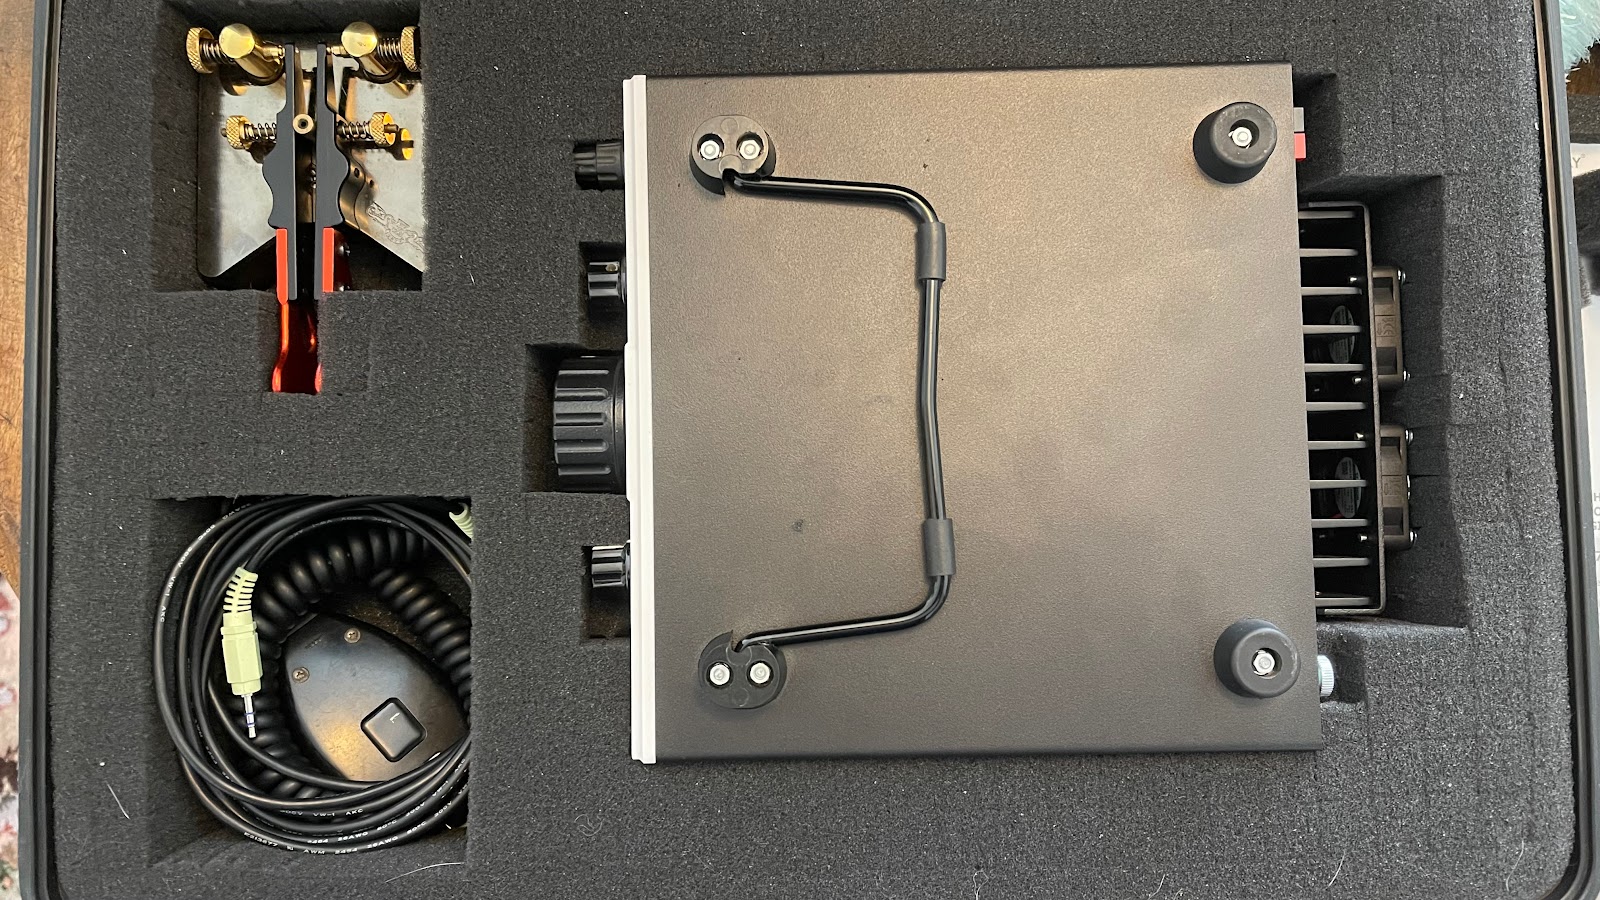
    During my last attempt at improving my CW, I was lucky enough to purchase a really nice Begali Simplex key.  That's the one on the right in the photo.  It is a lovely key and I find it very comfortable to use.  It has spring contacts and occasionally needs re-tensioning.  This year I reached State Pension age and for my official 'retirement' and birthday present, my lovely wife, Linda (G0YLM), bought me a fabulous Begali Pearl.  That's the one on the left in the photo.  This has magnetic 'springs' and is much more reactive.  I am still tweaking a bit ;)

    I love Begali keys.  Pietro engineers them beautifully and Bruna Begali is fabulous to deal with.  Their customer service is legendary and I bought directly from them.  I cannot praise them enough.

    I also have a portable key from CWMorse.  I have their N0SA key and it's great.  You will see this key in later YouTube videos.  Again, great customer service, although I could do without the religious tracts that come in the box.  Still it is a small price to pay for a great product.

    I am really enjoying my year of CW and it actually felt really weird to try SSB on a portable activation.  I hope to meet you on the bands at some point :)

    Thursday 4 May 2023

    M7MCQ


    I had the pleasure of meeting up with Tom, M7MCQ this week.  I could have chatted to him all day.  In fact, his blog has given me the push to start this!

    You can find his musings at M7MCQ QRP Blog and it is well worth a read.  Tom is an avid QRPer and his reviews are indepth and incisive.  I can recommend the blog as a great read :)

    Ian

    IT'S ABOUT TIME!

     I have been meaning to do this for some time.  I am active on YouTube in various guises and you will find some links here but I have not actually had a personal blog for years.

    Hopefully, this will become a place to centralise my stuff moving forward.  You will find activities, reviews, my thoughts on various products and anything else I can think of.

    I hope you enjoy it.

    Ian