It's been a while since I last posted anything on here! We have been so busy with our motorhome, I don't seem to have found the time for anything else.
One of the great things about motorhoming is that most of the time you are at sites with very little RF noise. Such a change from being at home where my noise floor on 40m sits around S6-7! As I like to ragchew on 40m SSB, this can make things pretty difficult, so portable working is great for me.
I take the Mission RGO ONE with me in Matilda (our motorhome) and that works happily on 50W into one of three aerials.
The aerial I use depends on where I am sited. Where possible I use the Sotabeams Bandhopper 3, This is a linked dipole and I support it using Sotabeams Tactical Mini mast. I can have this freestanding using guys or usually, I strap it to a mirror or the handle at the habitation door.
If I don't have enough room to get a dipole out as I only have room to one side, I use an end fed half wave. I got this from radio-stuff.com and it is lightweight and very portable. This aerial has the advantage of being able to run on 40m, 20m, 15m and 10m without a tuner. I usually mount it on the mast with the feedpoint at about 5ft and throw the other end into a handy tree, although it still works well with the end low. I use a 10m length or RG-174 as feeder and at the radio end I have wound a choke to limit any common mode currents from getting back to the rig. In practice, I have found no difference between this and the dipole.
Of course, sometimes I cannot get a wire out at all and then I use the JPC-12. This is a simple screw together, centre loaded vertical with a counterpoise and will tune from 40m to 10m without issues.
I carry all of this in stacking boxes from the 'Really Useful' company. This keeps it all neat and has little weight.
As you can see from the image above, I like to log on a computer. I use the superb Station Master logging system. This allows me to log from just about any device with cloud storage for my logs. It has all the features I need and I carry my MacBook Air with me for this.
I hope to work your as G0VGS/P from Matilda while we are out and about.
I have recently been looking at a spreadsheet that was released at the end of 2023 by a FOI request. To say I was shocked does not come close to expressing how I feel. Out of the 153959 licences on the spreadsheet, there are a total of 110580 expired licences. That only leaves 43359 licensed operators in the UK. The vast number of licensees have not revalidated since 2016!
Although we have a free licence these days (don't get me started on that one!), we still have to revalidate every 5 years. The revalidation procedure is rather arcane but it is simple to do. In order to revalidate, you MUST change something on your details. I know, stupid right?
So, the best thing to do is add a space in your address or something, revalidate and check.
With the upcoming changes that OFCOM are making, failure to do this may mean your callsign going back into the allocation pool and being issued to someone else! Try getting it back then!
So, please take the time to log onto the OFCOM licensing portal and validate that licence.
I have been setting up Thetis and making many changes as I learn about this fabulous program. I thought it might be useful to post the settings I use and so I have added a video on YouTube explaining how I have it configured. This is by no means a finished article. The program is extremely complex and I am sure I can do things better. Time will tell :)
A friend of mine recently bought this little SDR and was really taken with it. I looked at it and for the price, I couldn't resist buying one. The overall cost, delivered, was £297 from https://www.makerfabs.com
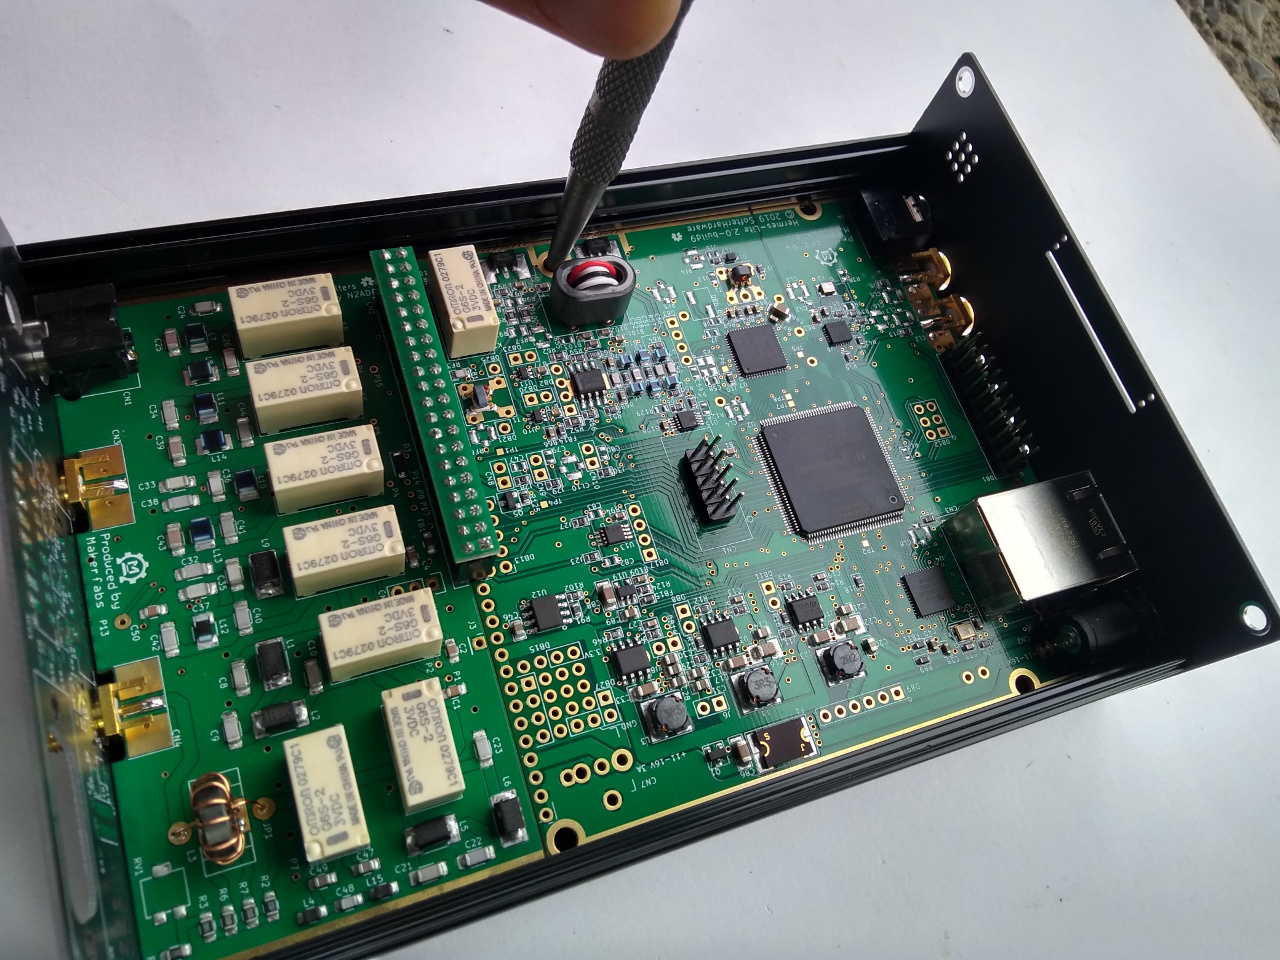
The Hermes Lite is a nominally 5W SDR HF transceiver (mine peaks at about 3.5W). It sits on your network via wired Ethernet and connects to your aerial via an SMA connector on the back. It could not be simpler. It arrives. in an overpack box containing 3 smaller boxes. The main board, a subsidiary filter board and the case. The case is a metal box with screen printed ends.
You need to mark and drill a hole in the case to accept a shim and bolt for heat sinking. Simple enough and the bolt is provided. Mark the hole by fitting the main board in and finding the centre with a punch or drill. Remove the board and drill the hole. Clean the paint off the case to give the shim a good contact. you may choose to add some heat transfer paste.
The shim requires filing down a little as it is too tight but it is aluminium and easy to do. Note the alignment of the shim to avoid damaging the components on the board.
The two boards are connected together with a header block as you can see in the image below left.
That is as hard as it gets. The boards are very well made and although the tolerances on the front panel are tight, with a little patience the boards go in and you can now complete the case.
Plug in the power lead (not supplied but standard), a network cable and an aerial and the radio is ready to go.
So, how does it all work?
Well you need some software to run it. There are various packages for just about all operating systems but the one that seems to be the standard for Hermes Lite owners is Thetis. I installed the main Thetis package and the fork by MI0BOT. Thetis was designed for the Annan SDR radio and Reid has forked it to work better with the Hermes Lite. It runs under Windows 10/11 and is simply superb.
The following page has both links and instructions on what to do.
Once you have installed the software, simply start the program. It will come up and look something like this...
Click the power button top left and it should find your Hermes Lite and power up! I don't intend to do a tutorial on Thetis here! Look for ON7OFF on YouTube, his videos are excellent.
I have had the Hermes Lite for a few days now and I am absolutely gobsmacked with the performance. Features in Thetis like the tracking AGC and NR2 (Noise Reduction 2 is seriously good), multiple variable notches, auto notch, 10 band EQ on TX and RX, Continuous Frequency Compression and much much more make listening a true pleasure. I have a noise floor of about S8 on 40m and Thetis simply ignores it. Obviously it can't lose the noise floor but I just do not hear it!
After some experimentation, I am using a cheap Thomann USB ONE microphone. This looks like a studio mic but isn't ;). It is a USB mic and gives really good results. Next on my list is a keyer to try the Hermes Lite on CW. The narrow filters are superb.
So it's out. The new licensing conditions start to filter in towards the end of February 2024. There are quite a few items to look at but for this post I am going to concentrate on repeater and gateways. A subject close to my heart as I run 2 repeaters.
The headline news is that from the end of February 2024, *any* licensee will be able to run a power limited gateway without having to apply for a NoV. Intermediate and Full licensees will be able to do the same for repeaters. Looking quickly at it, it would appear the gloves are off but such is not the case and a careful look at the new licence conditions is required to fully understand the limitations involved.
The document everyone needs to look at and study carefully is this one..
This is a long document and at the end of it is the new licence terms and conditions.
Let's take the easy stuff first. You will be able to set up a gateway or repeater (with regard to licence class) with 5W ERP on primary bands with no NoV. This will be fully unattended. You will simply use your own callsign for this. NOTE: 5w ERP. This means you have to take the loss in the feeder and the gain of the aerial into consideration. This is simple enough to calculate and there are websites that will automate this process for you. However, there is no limit to the height of the aerial beyond the normal rules.
You will have to make sure that you are not going to cause interference with anyone else. You will need to look at the band plan and do your best not to cause issues with anything. If challenged by OFCOM, you will have to show how you came to that conclusion.
This is fine where we are the primary user. Where we are the secondary user, 70cm for example, you will still have to apply to OFCOM. in order to gain frequency clearance and possibly to get permission to be unattended. You cannot just set up a repeater or gateway on 70cm without doing this!
I will paste the relevant sections below to show this. I have confirmed this by email with OFCOM. Currently there is no mention of going anywhere else than OFCOM for this but I will report back if I hear anything different.
--------------------------------
Remote control operation
10. The Licensee must ensure that, when operating the Radio Equipment by Remote
Control:
a) any links used for the remote control of the Radio Equipment must be
adequately secure so as to ensure that no other person is able to control the
Radio Equipment;
b) remote control links using Amateur Radio frequencies must use frequency bands
above 30 MHz;
74
c) transmissions from the Radio Equipment can be terminated immediately
promptly; and
d) the Licence Number (as specified above) must be displayed on or next to any
unattended Radio Equipment located other than at the main station address.
---------------------------------
---------------------------------
Unattended operation
11. The Licensee must ensure that, when deploying Radio Equipment for Unattended
Operation:
a) any links used for the remote control of the Radio Equipment must be
adequately secure so as to ensure that no other person is able to control the
Radio Equipment;
b) transmissions from the Radio Equipment can be terminated promptly; and
c) the Licence Number № (as specified above) is displayed on or next to any
unattended Radio Equipment located other than at the main station address.
---------------------------------
Further to these in the draft licence, there is a section A3, Notice of Coordination. This states the rules when coordination is required between interested parties. The relevant section for our use is at the top of page 100
There are other points for different bands.
There is currently some confusion about setting up a 5W gateway on secondary bands. I emailed OFCOM for further clarification and it would appear they are still in consultation about this. The following is an extract from the email chain.
'We will be releasing further guidance when we make our final decision to vary the licences. We are currently in ongoing discussions with the MOD and CAA concerning clearance requests. At present the existing rules on accessing these bands continue to apply going forward.'
So, as you can see, it is not just as simple as putting a gateway or repeater on 5W ERP and away you go.
Be aware that most hotspots do not support VHF. You cannot, as above, simply put your hotspot onto your aerial and use it when you take the dog for a walk. To be honest, you should *NEVER* put a hotspot on a high gain aerial. The spectral purity of hotspots is poor to say the least!
I have filmed a video about all this and you can find it below.
Finally we got out for a few hours in Matilda. We had a great times and managed a couple of egg and bacon butties :). The radio worked great and the weather was very kind.
I have started a YouTube channel for our adventures and you can find it here. I will be adding content as we go on and I hope to include our travels as well as radio related videos.
So here is the very first video and there will be more to come.
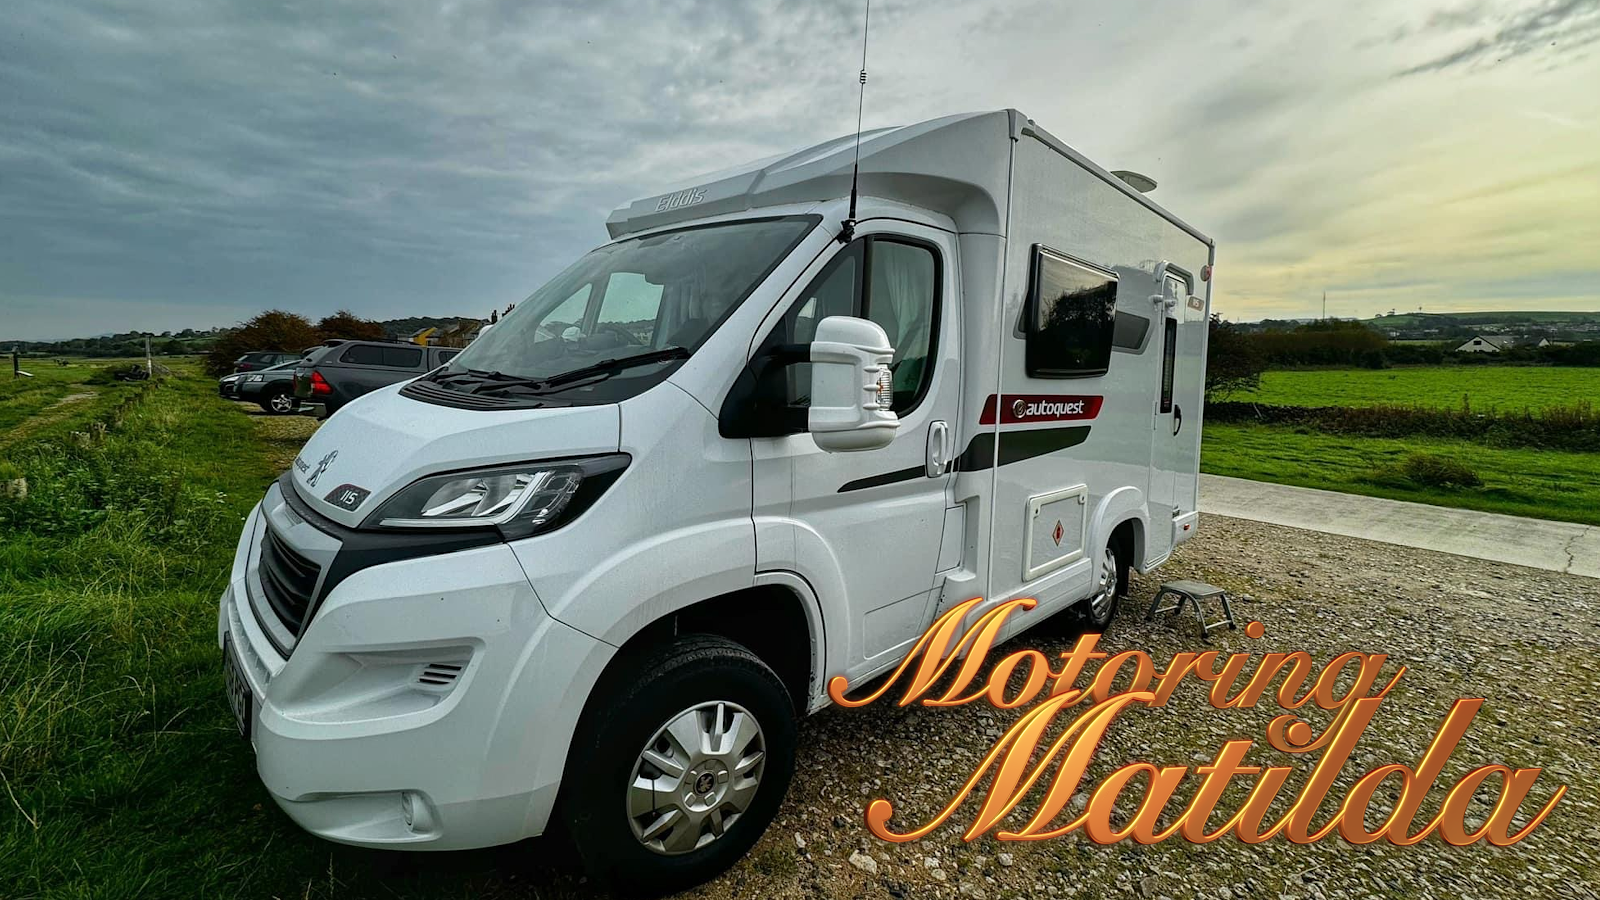
We have just invested in our first motorhome. An Elddis Autoquest 115. It is a lovely little 2 berth van, less than 6m long but surprisingly roomy inside.
Of course, our first thought was to get a radio in it. The problem is, where to mount an aerial? The vast majority of the body work is not metal, so getting a ground plane is tricky. I saw a video on YouTube showing a way to do it and decided to have a go.
Basically, the aerial is fitted on the passenger door. Linda finds it difficult to get in and out this way, so this door won't be opened that much. Nevertheless, I didn't want wires hanging around.
The mount I decided on was the Diamond K415. This has 3 axis adjustment. Perfect for the job.
I chose the Sharman MC-4MT cable kit to go with it. This is available in a couple of cable lengths and I decided on 4m.
This has a reasonable tail to get over the door and appears to be well built. The mount and tail look great from outside. I needed to make sure that the aerial would not bounce on the bodywork when mobile, so I fitted it down the edge of the door slightly.
The main issue was to keep the cable neat with as minimal a loop into the cab as possible. The loop has to be close to the hinges to keep it at a minimum length.
I had to think about this for a while but after some testing, I decided on holding the cable to the inside of the door lip using clear silicone. This worked well and I used Blu-Tack to hold it in place until it set.
Spoiler: I still haven't removed the Blu-Tack ;)
The hardest part of this was having the patience to wait until the silicone set! I was able to get the cable right down to dashboard level. This did require copious amounts of Blu-Tack!
Getting the cable up the side of the pillar was really easy and made for a tidy job with only a small loop.
I fitted the radio in the pelmet shelf over the cab. I had had a 12v point wired in ready and made for a safe and almost invisible installation.
I hope you found this post useful. Let me know if you have done this and what solution you used.
What a lovely week. The first week in September was scorching and I could not resist getting out to work some portable radio. I decided to activate some POTA entities. I have 4 in easy reach. G-0070, G=0266, G-0271 and G-0040.
I have done G-0070 several times but it is always a lovely place to be and I have finally found a spot where I am not bothering the public and the aerials are out of the way. Morecambe Bay SPA Protected area covers the area around the edge of Morecambe Bay and has both Lancashire and Cumbria options. I have not done the Cumbrian one as yet. It is easy to activate from the car.
G-0266 and G-0271 are a 2fer. Leighton Moss SPA (and RSPB) Protected Area and Arnside and Silverdale Area of Outstanding Natural Beauty. This is also easy to activate from the car. The ability to get a car to activations make is easy for disabled amateurs to join in with POTA. This inclusivity is one of the things I love about it.
G-0040 (Gait Barrows National Nature Reserve)is a little more tricky to find. I have previously attempted to activate this from the road but as Silverdale has a lot of rock, I could not get the ground I needed and I was a poor signal. I decided to do more research and found a lay-by to park the car and a gate giving access to the nature reserve.
It was a nice gentle little walk and I put the KX3 and BandHopper in the backpack with a small battery and a pad and pencil. The Tactical Mini pole sat nicely in the pole strap on my backpack.
I did not have any Internet and a very poor mobile signal at the roadside but I expected that I would have something when I was out in the open. This proved not to be the case. For information purposes I am on the 3 network. Next time, I will plan further ahead as I know where to go for the activation. I intend to walk a little more around this area at some point as well, it really is lovely.
One thing I will definitely take nest time is a groundsheet and a stool or lightweight camping chair. Getting down to the ground is simple enough but getting back up is starting to prove a little more problematical :)
I am also going to research the Knee Board idea. Postage from the States make the popular one over there really expensive, so time to check if anything is available over here or whether I can make one simply.
I really love doing POTA activations and I probably need to do some research around WWFF as well to increase the popularity of the activations. I also want to get a little further afield and find some more locations to operate from.
I have made a short video about my recent activations and you can find it below.
TNC's have not really moved on since the 90's in general. My interest was piqued by this new little board from TARPN (Terrestrial Amateur Radio Packet Network).
The NinoTNC is so named because the project was started in 2015 by Nino, KK4HEJ and has been developed since then. The latest design with the blue board was released in 2020 and the project continues.
This is a TNC that will operate up to 9600 baud to the radio and is simple to configure using on board switches.
It comes as a kit and with a little patience and a multimeter is a nice little build. It took me about 3 hours and that included testing at various stages and filming segments as I built.
The build sequence is very nicely done. You start with the crystal and then a few resistors and capacitors. Next you fit the socket for the CPU.
Now additional capacitors, including the tantalum capacitors where you must be careful of alignment. A resistor network and 2 pots for deviation and delay on the edge of the board. A voltage regulator is also fitted.
After fitting the USB socket, the device is powered up and a voltage test is done between the 2 socket pins labelled.
Now the rest of the build can be completed and final tests can be done. Everything is done from the board itself, making the tests simple to do once you understand the sequence.
Finally the board can be fitted into a box of some kind. This fine 3D printed case was sent to me by Matt, 2E0YML. Thanks Matt :)
I have done a couple of videos on this and you will find them below. Now all I need to do is interface it with the radio :)
Back in the 90's, I was heavily involved in the local packet network. This was well before the Internet became a normal thing! I dabbled briefly in AX25 packet but moved into the TCPIP Side of things quite soon after.
In the Morecambe Bay area, there were quite a few stations linked together known as the BayMAN (Metropolitan Area Network). It was great fun watching what would become normal Internet protocols working over 1200 baud via radio! We also had a licensed station up at Lancaster University too, with a chat server (WWConvers) and links around the world.
I eventually set up GB7MBC which added a DXCluster to our list of services. GB7MBC was the first Internet linked DXCluster in the UK and is still popular today. Of course, it runs, like most DXClusters, over the Internet now as packet radio in general cannot handle the amount of traffic with skimmer spots etc.
Linda was talking with a friend, Matt, G7HMV who was involved with packet in the south and mentioned it to me. Before I knew it, I was playing with AX25 packet again!
North West Packet Group was formed soon after, based around a FaceBook group, which at the time of posting has over 200 members. I could not believe the interest!
I decided to use my NoV and put the GB7MBC BBS on the air. It is accessible in the Morecambe and Lancaster area on 144.950MHz.
A second BBS has been set up in the Rossendale Valley area. This is well located and is GB7ROS.
Currently, we are the only BBS's in the North West and we will have some forwarding nodes coming online soon!
I have set up a website to help enable people to get involved and to provide a central information hub for installing node software etc and this is growing nicely. You can find it at http://www.nwpg.website
The biggest challenge for new users of packet radio is that virtually nothing has happened since the interest in the mode waned towards the end of the 90's. The old well loved programs like Winpack simply do not work under a modern Windows system.
That said, both BPQ and FBB have linux versions which are up to date. LinBPQ and LinFBB install nicely on a Raspberry Pi and work flawlessly. I have documented the installation of both on the website.
It remains to be seen if this resurgence of interest continues. It is wonderful to see people experimenting and enjoying the mode again.
Brian and I decided to brave the elements again this week. The forecast was mixed but looked to be improving throughout the day. (Spoiler: it didn't!).
It was rather gusty and the wind followed the tree line, so we were afforded little respite. Never mind, onward brave adventurers ;)
The bandhopper went up like a dream. I really have the hang of it now and it takes no time at all. The shelter was a different proposition :)
Linda suggested the shelter to me last week and we had a look for a suitable one. We ended up with this one from Amazon
It all packs down into a 2ft long bag and I think once I have got the hang of it, it should be possible to erect it in under 5 minutes. The ground sheet is good and strong and fitted via toggles. The two short poles are built in and there is one long sectional pole to thread. The poles are held together with an elasticated cord and they can be a bit of a pain until you realise that pushing in one direction is the way forward, rather than trying to pull them. There is a short video on YouTube showing how to do it but it does not really show too much.
As. you can see above and in the short video below, there is enough room for a small table and chair. You could probably get a table and two chairs if you knew the other person well enough ;)
It certainly worked. The main shelter was pegged down with the supplied pegs and just to be sure, I guyed the shelter down with the 4 supplied guys. Again, there is no instruction on how to do this but I attached them to the four loops on the shelter as it seemed to be the correct thing to do. You can see one of them here..
It didn't blow away, so I guess I got it right :). For someone used to camping or other shelter/bivvy type tents, this would seem simple but to me, it was completely new.
In all, it took me about 20 minutes to erect this time but I know a lot more about it now.
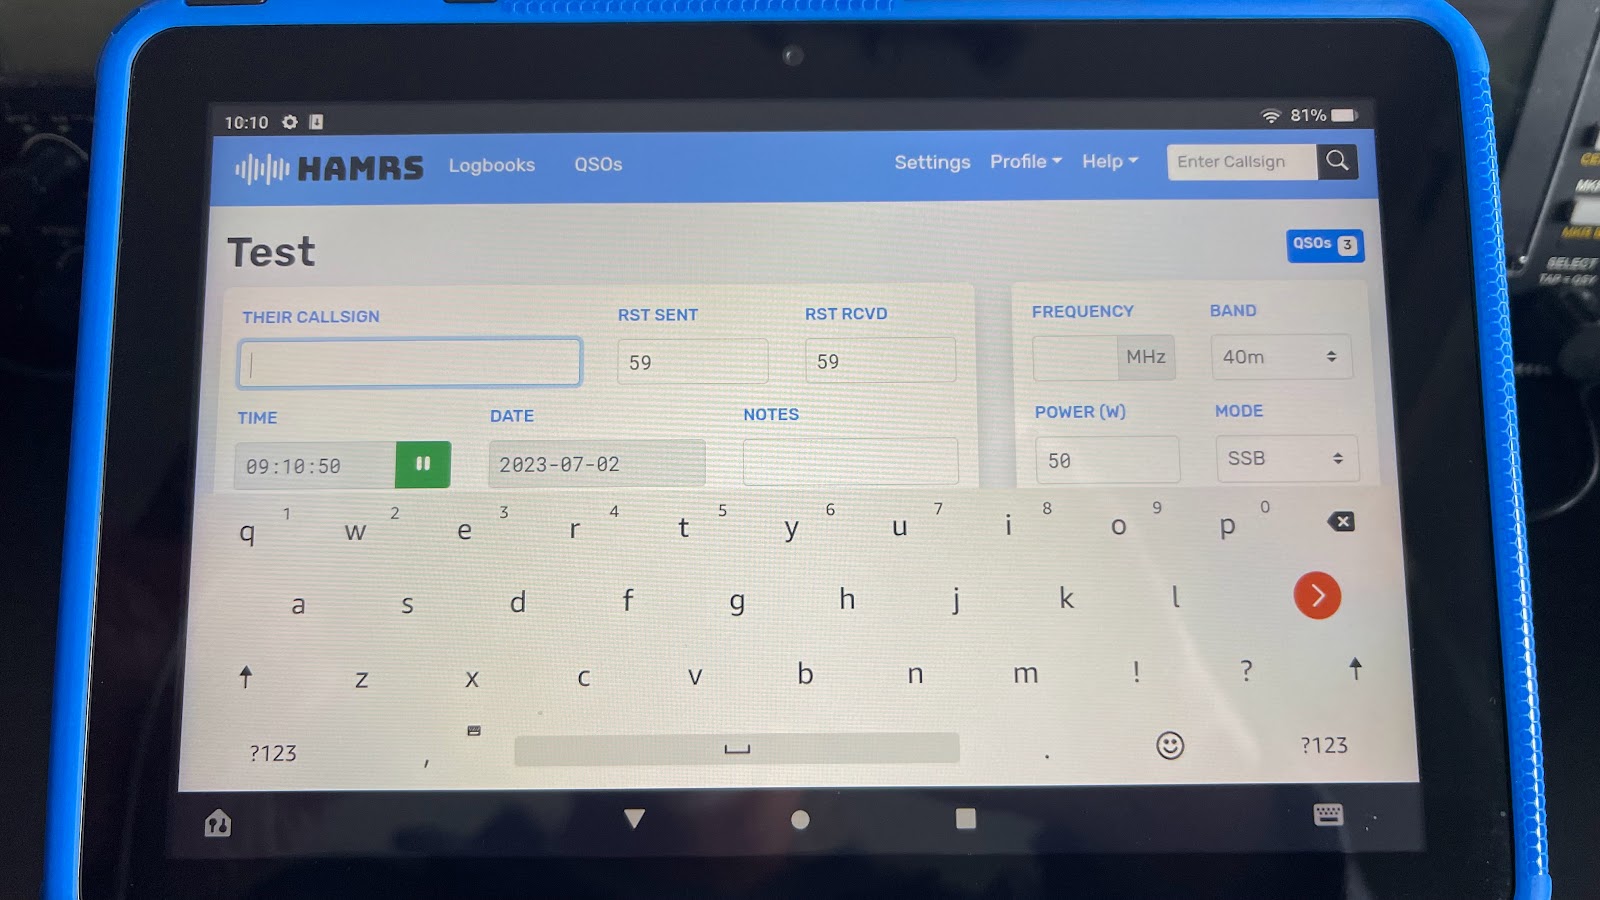
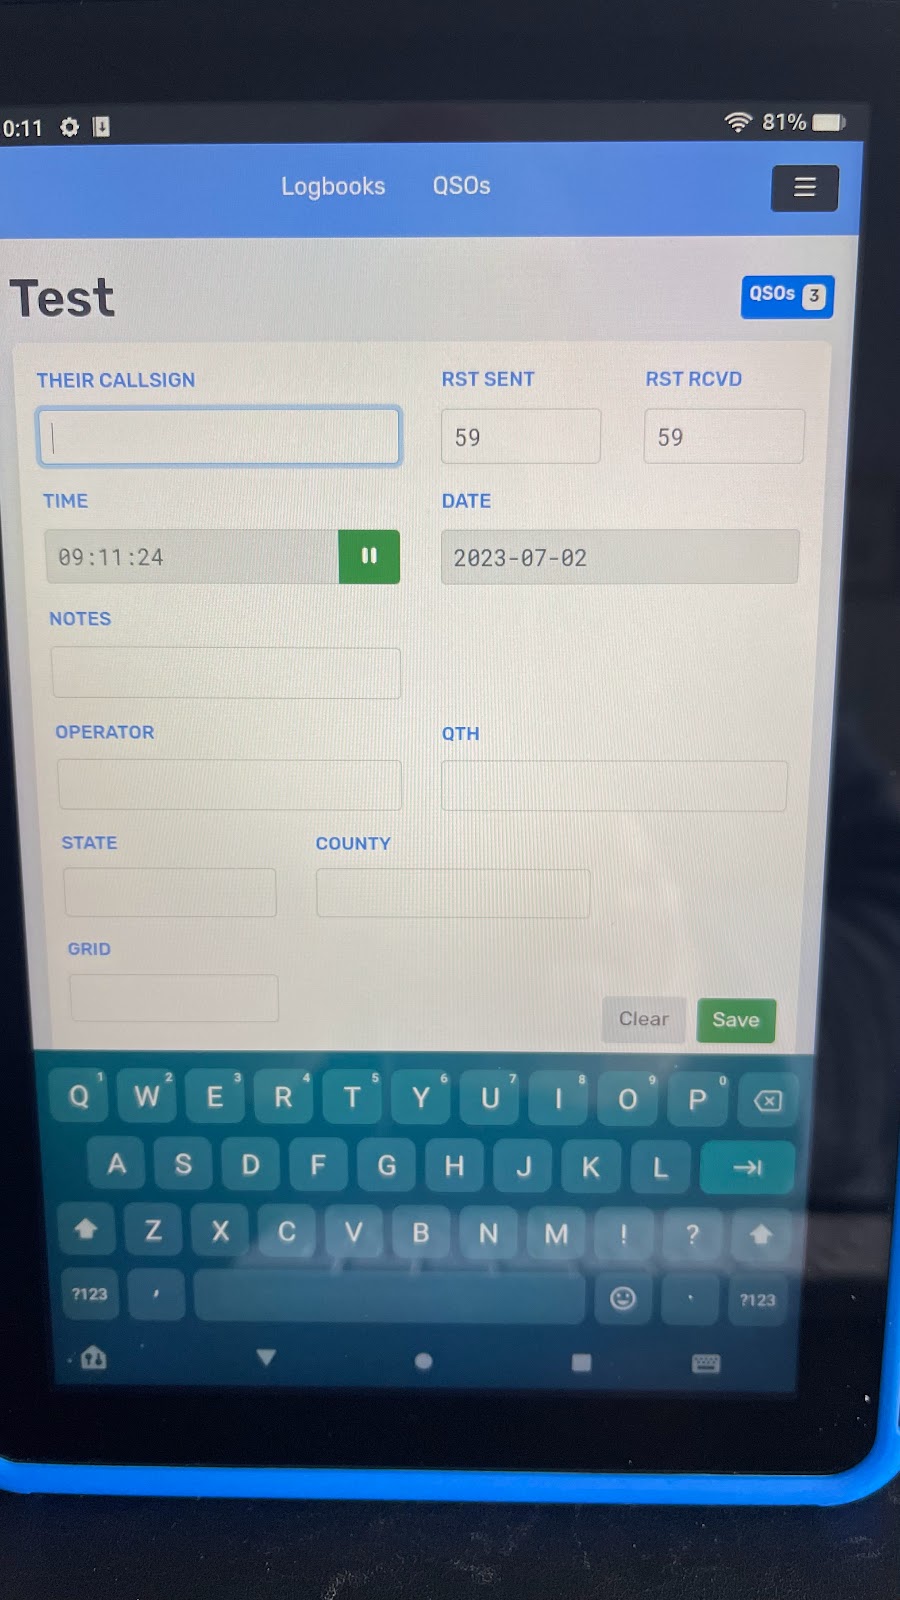
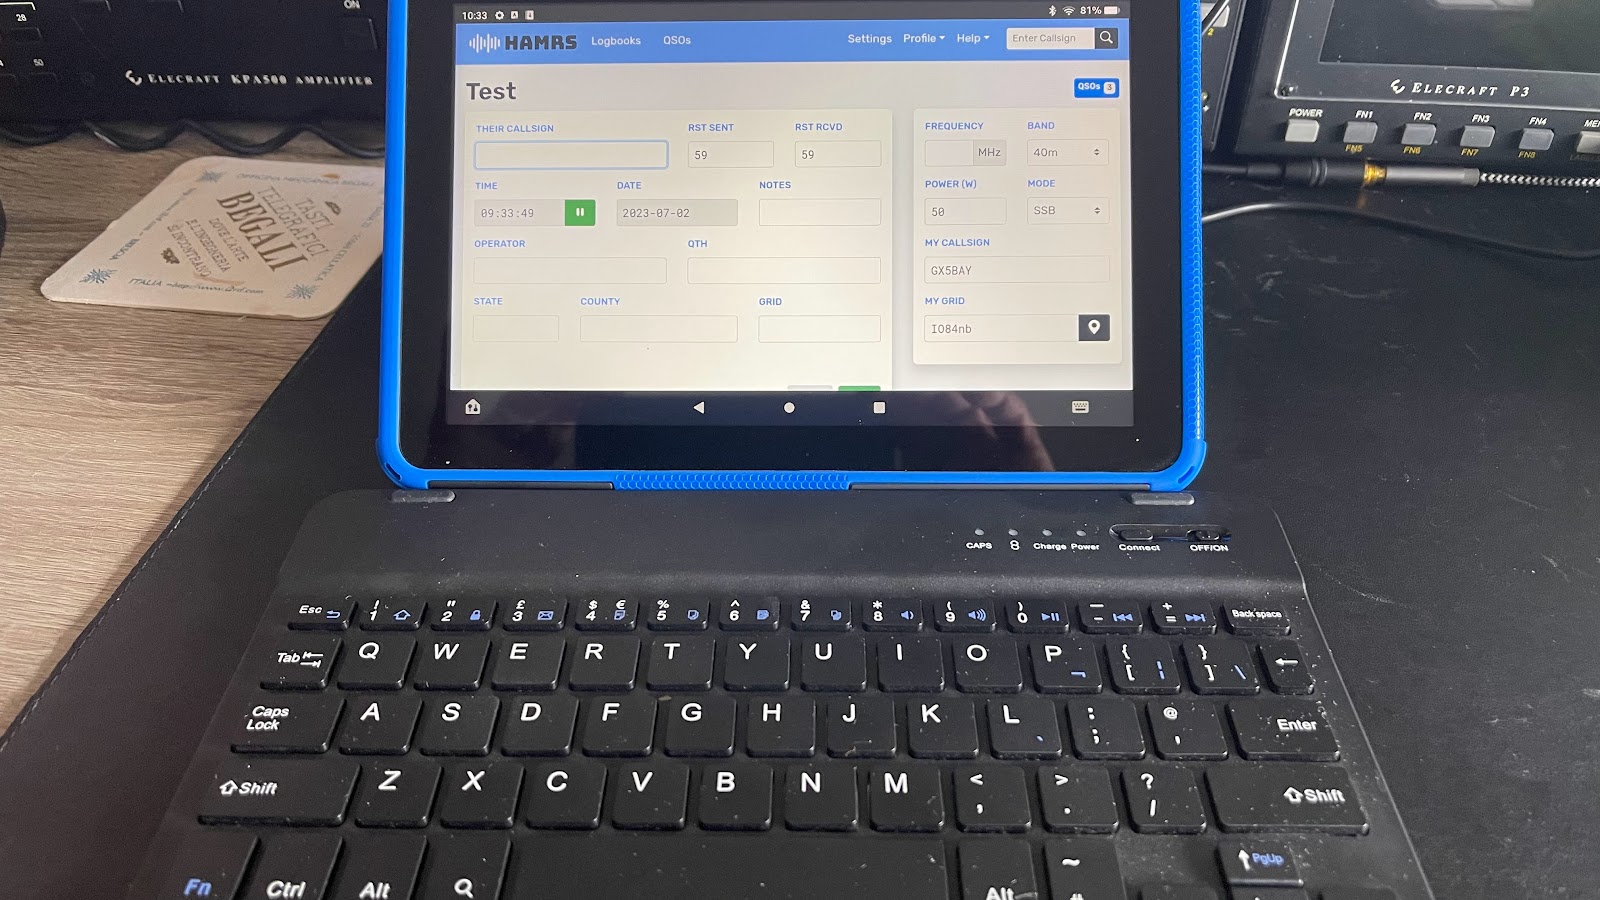
As well as this, I have been looking at alternatives for logging for some time. I have been using my phone with HAMRS so far and although this works really well, it means having the phone on a stand of some kind and renders it unusable for filming.
The previous week, Brian brought his Amazon Fire tablet with him. What a brilliant idea! I managed to get a refurbished one from Amazon at a good price and downloaded HAMRS on to it. HAMRS is available on the Amazon App Store.
Now I found my first frustration! The standard keyboard is large and even in portrait, covers the Save button.
The obvious thing to do was to find a smaller keyboard. The only one I could find that allowed resizing was Gboard. The only way to get this was to hack the tablet a bit and install the Google Play stuff. This was surprisingly simple to do and I got Gboard and set it to its smallest size. Now in portrait mode, I can get to the Save button easily.
Job done there then.
My next frustration was found almost immediately. Neither keyboard gave be a 'Return' key. They both appear to simply tab between fields. I suppose that I could simply tap 'Save' but it was bugging me. A good friend offered me a small Bluetooth keyboard to try. As soon as I connected this, the internal keyboard vanished and I had a full screen app with a 'Return' key :). Now all I need to do is enter a callsign, let QRZ and HAMRS do their magic via my iPhone hotspot and hit 'Return' to log it. result!
All in all, a really nice day out and we mostly managed to miss the rain. I had *just* managed to get my gear away when the heavens opened! Brian was not so lucky but we got his gear away with no issues and left feeling a bit damp but happy :)
Anyone who knows me, knows that I enjoy computers, I like to connect my radio to a computer to simplify logging etc. I have nothing against technology in general. I have been in communications and IT for years, professionally.
It's not that I am against data modes. I just don't understand the draw of FT8.
I have tried it and I guess it's OK but it seems that the whole world and its canine companion is using FT8. It's even invading VHF currently. Looking at the waterfall, some people are using incredible amounts of power as well!
As a low signal mode, I can see the interest from a propagation point of view. It's like a 2 way version of WSPR I guess but other than that I fail to see the enjoyment. I know people who have blown the finals on their radios by running them at full chat on FT8! Why? I mean, just why? Where is the challenge?
What about running it at 1W, or maybe 100mW? Of course, you might struggle at times to be heard through all the high power stations using double the bandwidth of everyone else, but at least it would be a challenge. I just do not get it. Linda used FT8 for 3 months on 20-30W and achieved DXCC without any difficulty. It's all too easy.
This year, I am concentrating on CW, from home at least and trying to get contacts is a nightmare. Now I appreciate that conditions are bad but getting contacts on SSB or CW is difficult. It sometimes seems that every band is open with FT8 but nobody is listening on any other mode.
I put calls out for ages on several bands and I can see that the bands are open by the RBN reports on CW but I get very few responses. In contrast, the FT8 frequencies are bouncing. Does nobody want to chat anymore? Are we becoming a hobby of computers talking to each other with us interacting occasionally?
Why not accept the challenge of SSB or CW on the HF bands? If you can't get an aerial out at home, go mobile. You can use a cheap end fed aerial and a battery, it doesn't have to cost a fortune. Portable radio can be a lot of fun, especially if you have a friend to go with. It's much more fun than watching a screen as well!
I am sorry if this came over as a bit of a rant and maybe it is the Grumpy Old Man starting to appear in me? Maybe it is just me, I don't know.
I hope to work you on SSB/CW very soon and have a good chat :)
OFCOM this week released their consultation document on the future of Amateur Radio in the UK and their proposals to move the hobby forward.
It is an interesting if somewhat long document with one or two minor errors but on the whole, a considered look at the hobby I love.
I am going to attempt here to formulate my thoughts prior to responding in full to the document and I hope that ALL amateurs in the UK will do the same. This is REALLY important to the future of our hobby and the biggest changes in some time, right across the licence levels.
Before I start, I want to thank OFCOM for their considered approach to modernising Amateur Radio. It is a complex task, involving parties well outside the UK and outside Amateur Radio as a whole. I do not envy them the task. That said, I reserve the right to disagree with them where I feel they have not thought something through well enough. I also reserve the right to change my mind after due consideration. This is of course, a working document and the changes are due to happen over a three year period. We do however, need to respond to this NOW! The closing date for you to air your views is 4th September 2023. This will come sooner than you think!
I am going to respond to the questions asked in the document in order and also add some of my own thoughts. I would appreciate any thoughtful comments on the proposals, or even my answers.
I was tidying up the boot of the car and thought it would be interesting to summarise the equipment I take portable. It's quite astonishing how it grows but I think I have everything I need now.
Did I really just say that???
It has been a very useful exercise for me. Apart from tidying up the boot and boxes, I got to realise just how lucky I am to be able to have all this gear and get the enjoyment out of using it! I live in an area of outstanding natural beauty, access to places to operate with very little background noise and enough space to play with aerials.
I always make sure to protect my portable radios with decent padded cases. They are not cheap radios on the whole and spending a reasonable amount on protective cases makes a whole lot of sense to me.
My QRP GoBox is a case I have had for some years and I used to transport my K3 in it on DXPeditions. I managed to get a piece of pick and pluck foam that fitted perfectly from eBay and relined it.
The QRO Box also came via eBay and cost a little more but was not overly expensive. It's a great box and nothing inside will come to any harm, short of being run over by a Steam Roller!
My aerials have all been reviewed on the YouTube channel but it was interesting to get them out one by one and think of their individual benefits. They all have a different part to play.
One thing I forgot to mention in the video was tools. It is always handy to have a few small tools available. Allen keys, cutters, screwdrivers, pliers, that sort of thing. A multimeter is handy too. Cable ties and tape complete this section.
I doubt I will be yomping up any fells, so I usually have the car close to hand but I could be very portable if needed and still be able to operate for 2-3 hours with a small backpack.
Portable radio is just such fun and you never know just what is going to pop up. I am just hoping we get some decent daytime conditions soon. I really would like to drop to QRP levels and see what I could achieve there but alas, the present conditions make it really difficult.
This video is a little longer than my usual fare but I hope you find it informative and enjoyable.
Brian and I went back to Dave's field this weekend and had a great time. You cannot underestimate the sheer amount of fun to be had with portable radio, especially when it is a shared experience.
One of the things we wanted to achieve this time was to get Brian's station running well. We identified a bad connector from last week and made a couple of leads up to correct the issue. He took the TS480SAT and powered it from his new Beaudens power station.
This little unit performed flawlessly throughout the day, running the radio at 50W SSB quite happily. The great thing is that it is small and light. Absolutely perfect for this kind of operation. If used at QRP levels, it would last ages! At 50W SSB, it would certainly last for most of the day. As it was, less than half of the charge was used.
It proved to be very quiet, RF-wise, which is obviously the main focus for us :). Bear in mind that the radio in use is not the most power efficient portable radio.
The next thing was how well I could put up the BandHopper. This was erected in much less time than the first and will be even quicker next time. Every day is a learning day!
We managed to get the aerials up just before it started to rain. We quickly relocated the radios to the cars and started to operate. The bands were not great, there having been a couple of minor flares, but as our noise floor was zero, it was not a problem from our side. I started on 40m and Brian was on 20m on the Slidewinder.
In fairness, I think I had the best of it. The bands were not great but 40m is usually fairly busy on a Saturday and I had a slow but steady start. 20m was not as good but Brian was managing a few contacts.
Brian was the first to crack and moved his station outside the car and I followed shortly after. We swapped bands, with Brian on 40m on the Slidewinder and me on 20m on the BandHopper. I discovered that I could lower one end of the dipole, keeping the tension on lightly and altering the aerial for 20m. Much quicker than having to drop the mast.
Much hilarity ensued when Brian moved the slider on the Slidewinder and when checked, it was absolutely bang on on 40m!! I bet he couldn't do it again 😆
I then moved to CW and managed a couple of contacts but the bands were closing in a bit and we decided to close down.
What a great day again though. I can really recommend getting out of the house and just having some fun for a few hours in an RF quiet place. You really don't need much to do it. If you make it QRP, you really need very little indeed and you could easily have a full station in a small backpack, as SOTA and WOTA stations know well.
As usual, I made a video of our day. I was using a gimbal for the first timed I definitely need more practice :)